Monday, October 12, 2015

Another Bad Mistake


Oct 9th 2014

The last time I posted was on my Trials of Trials blog in which I followed my progress on beginning to compete (ha ha) in Sporting Trials.
The main thing that I found was that as Baby-Boomer I am a bit old for getting bloody cold and wet on Sundays.
So I sold the car.

New Project
Short of a project I bought a boat, refurbished it and went sailing. This was doomed though as in my heart of hearts I knew that my feeble back couldn't stand the trauma of sitting still for an hour or so. The writing was on the wall as each time I ventured out my back killed me for a few days. We are not talking whinging little aches, but proper spasms of pain.


Another New Project
Boat sold, I saw that the Northern Phoenix Trial Club were holding a trial at Dockray just along the shores of Ullswater in the Lake District and not 15 miles from home. So I ventured along to have a look and take some video.
As bad luck would have it it was a lovely day, and even worse I discovered that Bob (who has a new-to-him car) had not sold his old one. He was not talking silly money.
I knew the car from the trials I had done and a few opinions from others revealed it was a "bit of an old nail" but very able car.


RayBax had been built by a well-regarded club member, Raymond Baxter. I had not known him, he had died before I joined. Having passed through a few hands, the last 5 years or so had seen it driven by Bob and Jeff and later just Bob.

I went to Bob's farm near Kendal for a spin and was slightly taken-aback by the car's crudity but more so by the way it romped up long steep grass hills. The Concord I'd had would have lost grip part-way up. Maybe that would have been my fault (probably) but driving in the same way this car continued up to the top.
Very encouraging.

If you had read my previous blog you would guess that I find the whole refurbishing process engrossing. In fact I find that being cuddled up in the garage bending or drilling or welding something is very enjoyable. Knocks spots off getting cold and wet.

Deal done I returned a few days later to collect the car and trailer. Bob had been making noises about not being happy with his new car and thinking he would be better off continuing with RayBax. Gamesmanship of course. He's bound to take a while to settle into the new one.


Sunday, October 11, 2015

Usual Lack Of Posts Then A load All At Once


Nov 30th 2014

Having got the RayBax home I had a good look around it (obviously) to see what needed doing.
The clutch was very, very sharp and the front brakes were seized.
All the hydraulics on the bulkhead were seeping fluid and the exhaust was a bit noisy.
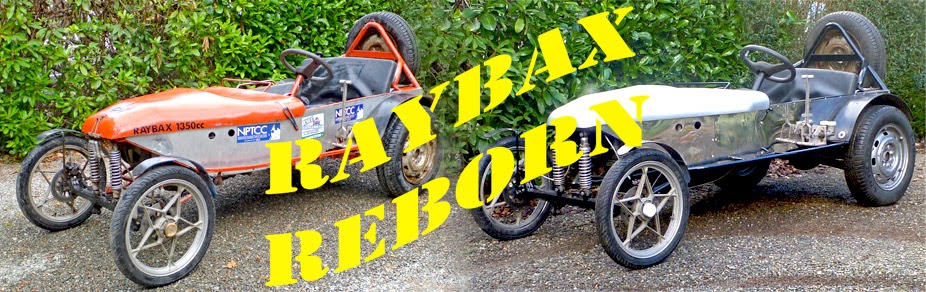
The whole car was painted red. I had sort of fallen out of love with red so decided to strip the car right back and paint the frame black and fix anything I came across whilst doing that.


The side bars were a bit wobbly, made of quite lightweight square steel tube. I decided to take them off and make up some new ones in round tube.


The clutch seemed to have too long a pedal (Literally. The pedal was too long), as my boot was bearing on the arm not the pad, and not enough movement at the master cylinder. The slave cylinder was new, but the release arm at the bell-housing seemed too short so the slightest movement of the slave push-rod let the clutch engage with a bang.
I altered the pedal push-rod attachment to get more movement, and improve the angle to the master cylinder. Then I lengthened the release arm at the bell-housing, moving the slave cylinder to the other side of the mounting rail to operate it properly.
That seemed to fix the clutch operation.


The brake pedal was a bit lightweight so I strengthened that and shortened the arm as well. Again the push-rod wasn't quite concentric with the master cylinder so I altered it's attachment position again.

Wheely Rusty

Whilst I was getting into this I was attending to the wheels which were a bit battered. I took the tyres off. The insides of the wheels were a bit grim. A couple of very noisy afternoons, lots of rust dust and very dirty hair later I'd got them clean enough to straighten and paint.


My other car had tubeless tyres. You tend to remove those quite often to get the grass out from the bead and seal the rims. With tubes you possibly don't have to do that so often and the corrosion and muck build up.

The next thing was to remove the bodywork and store that in the greenhouse whilst I stripped the frame and checked it for corrosion or cracks. It was remarkably rust-free. The only cracked welds were on the pedal box frame and one on a bracket on the front axle. It looked like it had suffered a bit of a belt.


Whilst I was moving it about I thought it was very difficult to push, which can't help performance. It turned out the front wheel outer bearings were seized (they are small needle rollers) and I later discovered that the propshaft UJ was seized as well. Of course you always find out with vehicles like this that parts are sourced from everywhere.
The needle rollers bearings were (of course) about £20 each. The inner, larger, bearings are about £4 each.
The brake calipers are a slight problem. I have managed to get seals and a piston, but one has a broken bleed valve. Rather than just leave it and bleed through the hose banjo I decided to get the old nipple out. Mistake. Despite an engineer friend's attempts using top quality easy-outs and heat, the boss the nipple is screwed into has cracked. I will just alloy weld it up and do what I should have done in the first place. Bleed through the banjo. (You can even get adapters with a nipple in to allow you to use banjo.)
The calipers are from a pre-1988 Kawasaki trail bike, so the chance of finding another is zilch. New calipers are about £120.

Similarly the propshaft UJ has a Unipart bearing-joint in it. It's the same as used in Midgets, Spitfires etc etc.
I have the measurements and it took a while to identify it. These are not common items these days. I found a firm online who had the joints, GUJ 101, in stock. I got one. It's the wrong size. I rang him up and he said "No-one else has complained"
I found another supplier who had a GUJ 101, which he measured for me and it was correct (only a matter of 1.4mm, but that is a lot). 
The rear brake calipers are Ford Fiesta. Although they were seized and had a broken mounting bolt a bit of Plus Gas and dismantling sorted them out OK.

Don't think I am suggesting that Bob wasn't keeping the car running properly. He has had his smart new(er) car since February and I bought this one from him in September. I think it had one outing at the practice day in August, but other than that it's been sat in a barn or wherever.
Apart from that he has a farm to run and cows to milk etc, unlike me who has sod all to do really.  

Another thing I did (the first thing actually) was to service the trailer and make sure the brakes were working and bearings greased and adjusted. I've had too many trailers to trust this to chance. When they stand unused for a while they usually suffer. I also wheel it about a bit, now and then, so that the bearing's rollers are not always left in the same place on the tracks. 

Suck or Blow
When I took the radiator off and the cooling fan I was a bit baffled at the look of the fan. Plugging it in again showed that it pulls air from the engine, through the radiator, towards the front of the car. This isn't very helpful really, if you are moving forwards. I tried reversing the feed and it ran backwards, but not pushing much air. Coming from a Triumph Acclaim (I presume) it's likely that it was mounted behind the radiator in the original installation, which would work well with the natural airflow.
In front of the radiator it's doing the wrong thing. It is also pretty massive. I will look for a front-mounted electric fan down at the scrappies. At the worst I'll get a Kenlowe.
There is also a stainless steel vessel in the top hose, presumably to prevent air locks stopping the through-flow of water. It looks like someone has gone to some lengths to fit it. I can't see how it works though and have chucked it. The last car worked well enough without so we shall see.


That'll do for this post. 
The next one will deal with the back axle, fuel tank, new side bars, front axle, water pump plumbing and exhaust


Saturday, October 10, 2015

Right. Detail Stuff


Dec 14th 2014

Up 'til now I have been addressing the stuff I have come across in order to bring the Raybax up to a good sound condition. During the strip down I have come across several items that needed adjusting, mending or replacing. Some of them essential, some of them for the sake of being pretty.


This shot shows the novel, real wood, seat partition under the foam cushion that keeps driver and passenger apart.


Stripping down the bodywork exposed the frame and I was very pleased to see that no cracks or damage appeared when stripping the red paint off. I've already started doing the front of the chassis in black at the front. I'm using Tractol primer and gloss.


I removed the axles and perhaps that's the best place to start with the modifications. In this shot below I have painted most of the frame and the rear axle is ready for cleaning and painting. I had thought of using a 2 pack paint, but the fact that I knew I would be welding a lot of bits to the frame put me off that idea as the Tractol paints are easy to touch up. The primer is black as well as the gloss. Not easy for making sure you have covered it well, but I thought it would be good for avoiding a scrappy look if the paint got chipped.


Some of the things that needed attention


  • rear axle breather
  • front axle
  • sidebars
  • exhaust system


  • Rear Axle
    Nothing to report really except that a glaring problem was that the breather was a simple hole in the casing. 
    This is because of the Honda engine. This range of engines turns anti-clockwise as opposed to the more normal clockwise of most other engines. This means that the propshaft turns the wrong way and the axle needs inverting for the wheels to turn in the right direction. Sounds wrong, but work it out.
    This was the breather that had been drilled in what had been the underneath of the axle "banjo".
    The original breather (now underneath) had been welded up.

     
    The problem with this is that oil can be pumped out, and dirt can get in. I needed to fit a neck on there for a rubber hose to slide on to.
    I cleaned the casing up and decided to weld an air line connector to cover the hole. I cut the threads off and used a rod inside it to hold it in the right position whilst I MIG welded it on.


    Tidied up and painted it looked about right. Nothing else was needed except the coat of paint.


    Front Axle
    There wasn't a great deal to do to the front axle. 
    Except.
    The welding wasn't the tidiest. I stripped the paint and removed the stub axles. That was one hell of a job. The king pins were stuck in the hub carriers and needed a lot of heat and hammering to get them to move.
    One of the brackets on the bottom was twisted and had a cracked weld. It must have had one hell of a whack. I couldn't straighten it easily. That didn't matter as it was a ball joint that attached to it so the angle could easily be accommodated.


    Once it was all clean I ground the welds back and then built them up with a stick welder so that I could get a pleasing finish. Probably not actually any stronger, but satisfying.

    Side Bars
    The old ones were a bit battered and to my eye were mounted too high at the front. I decided to make new ones which would be parallel to the chassis frame's bottom rail. The driver's-side rail supports the fiddle brakes and the other side rail supports the exhaust.
    I decided to have four brackets plus the front mounting. These brackets would be smaller tubes welded to the chassis over which larger tube brackets on the side bars would slide.
    The only bolted connection would be the shared with the front radius arm ball joint and the fiddle brakes mount at the rear, and a tab on the other side for a nut and bolt keeps the rear of that bar on. This would mean they were fairly easy to remove, if needed


    .


    This is just tack-welded when I was arranging it.


    I was tempted to chrome these bars, but cost was a consideration.


    Exhaust

    There was nothing really wrong with the system except that it was a bit "wobbly" and it was clamped at the manifold so was difficult to seal properly. I don't like chuffy leaks on exhausts.


    I welded the front pipe (a new one made up from odd bits I got from an exhaust fitter) to the manifold and made the joint at the silencer instead.


    Still to do
    • boot area and fuel tank
    • bulkhead
    • cooling system leaks
    • electrics
    • lack of sumpguard
    • footwell floors

    I'll deal with them in the next post.


    Friday, October 9, 2015

    Some Fancy Bits

    Jan 17th 2015

    Now that I'm getting towards putting things back together there are some particular bits that needed looking at. 

    Sump Guard

    The car didn't have a guard, but did have a couple of creases in the sump pan so I thought a guard would be a good idea.
    I got some thickish (very technical) alloy tread plate and started to make up some brackets to fit it.
    I decided to suspend them from the engine as the chassis frame was too far away and the brackets would be at an angle and maybe would cause distortion in the chassis if it took a big knock.
    This became a bit tricky as the engine is mounted at a slight angle. Anyway, a bit of fiddling and a spirit level seemed to get it about right.
    I bent the plate at both the front and the back as the last car got stuck trying to reverse off a hump when the trailing edge of the sump guard dug in.

    In place it looks very smart and should do the trick. 


    A couple of more general shots to show progress


    Cooling System

    This was in need of a bit of love and care. There was a drip from the water pump. the hoses that went around the back of the block were very degraded with oil and the top hose had a foreign body, in the shape of a stainless steeel canister, in it.

    The water leak turned out to be the water pipe which runs from the water pump along the side of the block. It's the same as the Suzuki one with a flange holding an O ring to seal it to the pump body. The steel pipe corrodes and the O ring stops sealing.


    I managed to get another pipe from Greggs (Scrappy, not bread shop) from a Honda Civic. They use a similar pipe. I just had to cut off one end and alter the mounting bracket a bit.


    This is the hole the O ring seats in.


    It cleaned up easily. As far as I know it's done the trick. When I get round to starting the motor I will know better.
    This is the new pipe fitted into the water pump


    This is the other end with the new silicone pipe disappearing around the back of the engine.


    At the front of the engine I removed the stainless steel can and put a bit of pipe in the top hose. If that doesn't work it'll be back to the can.


    Rear Compartment

    I suppose you call it a boot. It was a bit dirty and the fuel tank looked like it may be rusty so I took everything out to check.


    The tank was a bit close to being "Holy" but I thought it would be OK as long as it was kept clean, so I painted it.


    I painted the boot space white. Not for any technical reason, but because I had the remains of a tin of white floor paint.


    Footwell Floors

    The original floor is a large sheet of alloy, which is fine. The footwells were smaller bits of the same stuff, but the passenger side one was not a great fit and the driver's side one was fitted underneath the chassis rails. So muck tender to collect on it and my feet would no doubt get caught up in the rails.


    The gearshift and steering column pass through the drivers footwell.
    I got some more alloy treadplate and cut some new footwells from that. It was a bit awkward getting them to fit and connect with the new bulkhead I was fitting. In the end it all worked fine. 


    In the shot below you can see the steel "grenade guard" over the prop shaft joint and the new bulkhead panels. I've also polished the inside lining panels.


    Bulkhead


    To begin with I was going to strip and paint the existing bulkhead. However it seemed to be steel from building cladding which it had a pretty leather look finish to it, which was a bugger to remove. I had some alloy sheet so I've put a new bulkhead in using that.


    That's all for the moment. I haven't mentioned the electrics, which are not finished yet, or the outer panels, which are almost done.
    There's also the cooling fan to sort and the front brakes to finish.
    Plus, of course, the bonnet to do.